Update: Here is the completed repo branch if you want to pull it down for reference: https://github.com/JimSchofield/Guty-Blocks-2/tree/tutorial/media-block
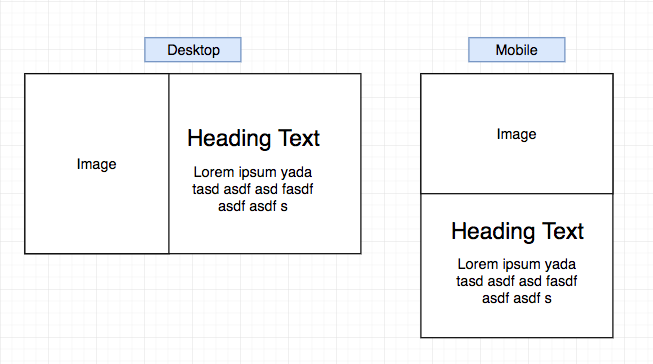
Our goal is to create a beginner Gutenberg block- a media block where a content editor can change the picture, change the heading and copy text, and modify justification. This is a bare bones tutorial that walks through the ins and outs of WordPress Gutenberg from the very beginning.
So I’m not expecting the reader to know much if any about developing a Gutenberg block. I am expecting the reader to have a basic knowledge of React and JSX. They should also know enough to be somewhat dangerous in css.
Also, in case you’re not sure what a media block is, here’s a simple simple sketch! This is our goal:
Here is the outline of what we’re going to accomplish:
- Get our block set up and loading in the editor
- Output markup with dummy content
- Style the block
- Make the text editable
- Make the image changeable
Getting started: Setting up your block in WordPress
So we’ll be building this all locally, meaning we will need to spin up a new WordPress site. I recommend downloading Local by Flywheel because it makes it so easy to start a new WordPress without configuring databases and so on. If you have your own methods, go for it.
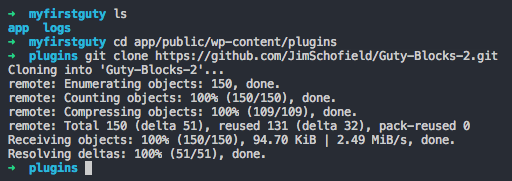
Once you have a WordPress instance up and running, let’s go to the plugins folder inside your WordPress directory in the terminal.
To get up and running quickly we’ll use my Guty Blocks 2 plugin. This includes a webpack build already configured to generate and build block files. Once you’re in the plugins folder, git clone the repo:
Once that’s done, cd into ‘Guty-Blocks-2’ and run ‘npm install’. This may take a minute or so. Once it’s finished we need to a) generate a boilerplate block and b) build the block.
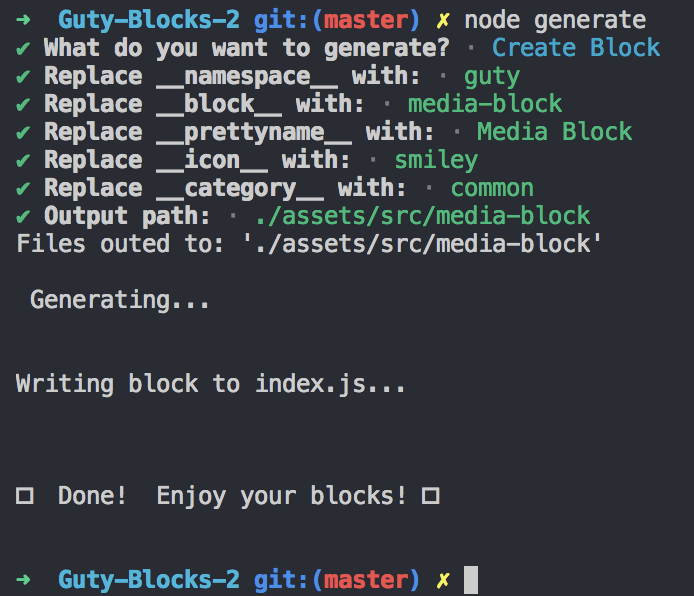
In the terminal, generate a block by running ‘node generate’. Select the regular ‘create block’ option. You can answer the prompts any way you would like, but here are some pointers:
- namespace – if you want to group multiple blocks together, this is important. For now I’ll call the namespace ‘guty’. It’s up to you
- name – The name the block is registered as in WordPress and files are named. This is not what you will see in the editor, so I will call this ‘media-block’
- prettyname – The name you will see in the editor when you add the block
- category – For now, let’s just go with ‘common’. WordPress has predefined categories for blocks. If you choose a name that doesn’t fit, the block won’t load!
- icon – You can pick one from the WP dashicons. I will do ‘smiley’
Now to make sure that any changes you make from here we are going to run the build process in watch mode. We do this by running ‘npm run watch’. You should see webpack build all the files and then pause- it’s waiting for you to edit!
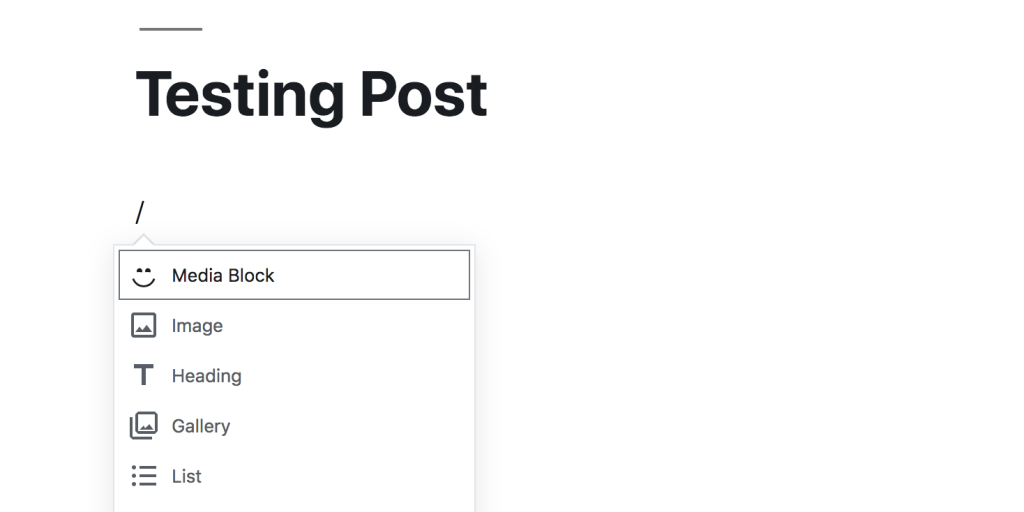
❗ To see the block in WordPress you need to log in to the WordPress admin, go to plugins, and activate the ‘Guty Blocks 2’ plugin. Then, if you go to a post or a page you can select the block.

Alright, so now we have a block loaded. Let’s actually start coding…
Output markup with dummy content
Let’s take a look at the file structure inside of ‘Guty-Blocks-2’ in the plugins folder.
Most of it is build environment boilerplate. The important part is under ‘assets/media-block’. Here we have media-block.editor.scss, media-block.view.scss, and media-block.js.
media-block.view.scss – This stylesheet will be loaded both in the view and in the gutenberg editor. Let’s clear this out so there are no styles, but keep the class name! Ahhh… fresh no styles.
media-block.editor.scss – This stylesheet loads in the editor only. Think- sometimes there needs to be style hints that a buttons is clickable or an image is editable. We don’t want that on the view of the page- only for editing. For now, let’s clear these styles out so only the class name remains, too!
media-block.js – This is where we will do the bulk of our work. Let’s go there now. Specifically, we’re going to go to the edit() function. This method is what is run when the block is put into the editor. They are living, breathing, react components. Let’s change what’s in the <div> to the following.
edit(props) {
const { className, setAttributes } = props;
// const { } = props.attributes;
return [
<InspectorControls>
{/* Later, when we have customizable options we will add stuff here! */}
<div
style={{
padding: '1em 0',
}}
>
Options
</div>
</InspectorControls>,
<div className={className}>
<div className="media">
<img src="http://placehold.it/500" />
</div>
<div className="copy">
<h2 class="copy-hd">Heading</h2>
<div className="copy-bd">
lorem stuffs...
</div>
</div>
</div>,
];
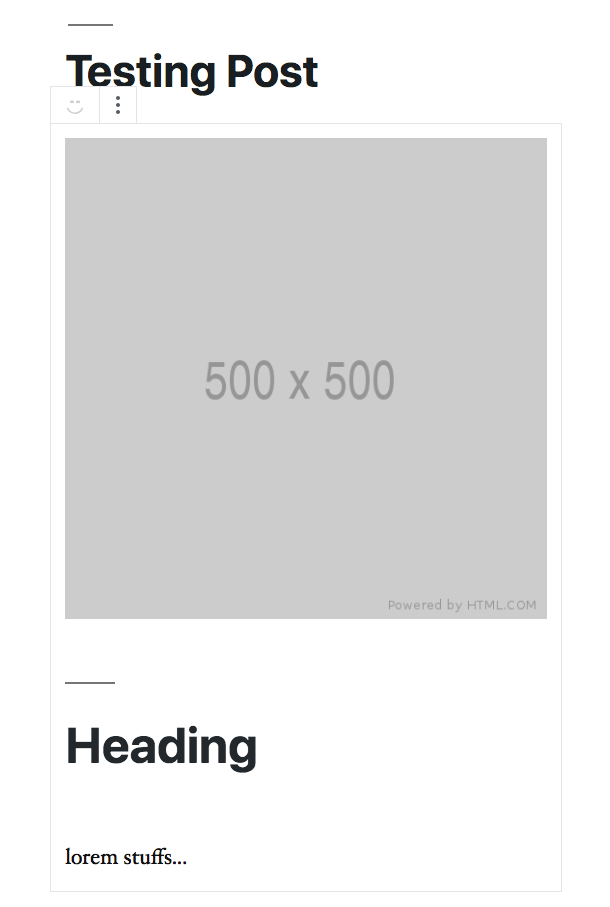
},Now, we should see some markup spit out in the editor!

Now, if you publish or save the post, you’ll notice that when you view the page it doesn’t change. That’s because we need to duplicate the markup in the save() method below edit(). Here’s what we should do…
save(props) {
    const className = getBlockDefaultClassName('guty/media-block');
    // const {  } = props.attributes;

    return (
        <div className={className}>
            <div className="media">
                <img src="http://placehold.it/500" />
            </div>
            <div className="copy">
                <h2 class="copy-hd">Heading</h2>
                <div className="copy-bd">
                lorem stuffs...
                </div>
            </div>
        </div>
    );
},
You may need to delete the block when you reload the editor to see your changes. This happens a lot… deleting your old block, loading in your new one. But now, you should see your work on the front end when you view the page!
Style the block
Okey dokey. We’re going to now style that block to resemble a side-by-side layout like a normal media block. I’m heading over to media-block.view. It’s alright if you just copy the styles and look it over later- the point here is not a lesson in css.
// for styles loaded in editor and in the view
// This class name is automatically generated for the blocks we make
.wp-block-guty-media-block {
// for simplicity, I'm going to wrap my block with the block name
// and then I can use common classes like copy or media without fear!
// Let's display the content in a row
display: flex;
// And let's center the items vertically
align-items: center;
padding:.5em;
//Set a font for the block
font-family: 'Avenir', 'Helvetica', sans-serif;
box-shadow: 0 0 3px 0 rgba(0,0,0,.3);
.media {
flex-shrink: 0;
width: 35%;
margin-right: 1em;
& img {
// remove the annoying space underneath images
display: block;
width: 100%;
}
}
// I'm choosing some of my own styles here
// You can do what you would like!
.copy .copy-hd {
font-size: 36px;
font-weight: 300;
margin: 0 0 22px 0;
// this is only required in 2019 theme... because they have these decorative lines
&:before {
display: none;
}
}
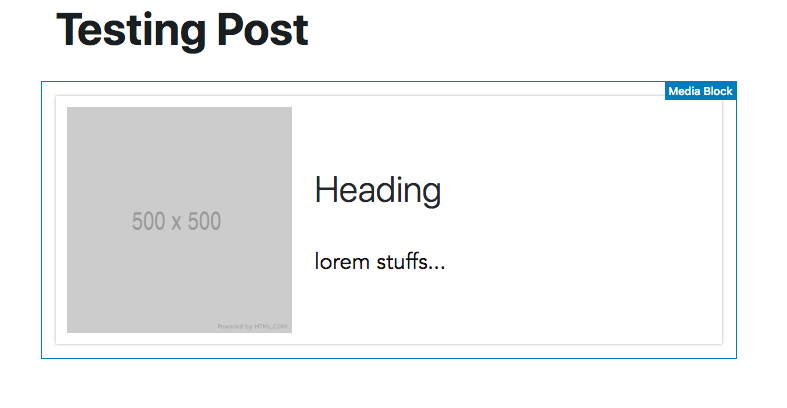
}This is starting to look a lot better!
Let’s add some styles for when the screen gets small. Note, I’m going to let default styles be for mobile, and then I’m going to set media queries for tablet and higher. I will be refactoring a bit of this scss! Here are my refactored styles.
// for styles loaded in editor and in the view

// This class name is automatically generated for the blocks we make
.wp-block-guty-media-block {
    // for simplicity, I'm going to wrap my block with the block name
    // and then I can use common classes like copy or media without fear!

    // Let's display the content in a row
    display: flex;
    //on mobile default to column
    flex-direction: column;
    // And let's center the items vertically
    align-items: center;
    padding:.5em;
    //Set a font for the block
    font-family: 'Avenir', 'Helvetica', sans-serif;
    box-shadow: 0 0 3px 0 rgba(0,0,0,.3);

    // on tablet or higher, go to a row layout!
    @media screen and (min-width: 376px) {
        flex-direction: row;
    }


    .media {
        flex-shrink: 0;
        width: 100%;
        margin: 0 0 1em 0;

        @media screen and (min-width: 376px) {
            width: 35%;
            margin: 0 1em 0 0;
        }

        & img {
            // remove the annoying space underneath images
            display: block;
            width: 100%;
        }
    }

    // I'm choosing some of my own styles here
    // You can do what you would like!
    .copy .copy-hd {
        font-size: 36px;
        font-weight: 300;
        margin: 0 0 22px 0;

        // this is only required in 2019 theme... because they have these decorative lines
        &:before {
            display: none;
        }
    }
}
Making text editable: using RichText
Here is the meat of why Gutenberg is awesome. We can place components in that handle text editing. We just need to wire them up. We will be pulling <RichText> from wp.editor. WordPress was nice enough to just give us all these components. Thanks, WordPress.
But before we can actually save and edit the text, we need to visit the concept of state. In React, you have state, and the view renders that state. When the state changes the view gets updated.
Same thing happens here. Instead of state, we now have “attributes.” Attributes are updated by calling the “setAttributes” function passed to the edit function. But these things are not special, they’re basically state but they’re saved with the block when the block gets saved. We also will need to hook up a “setAttributes” function to update attributes when someone types anything in the RichText component
At the top of media-block.js, let’s add this:
const {
    InspectorControls,
    RichText
} = wp.editor;
Now, in attributes section, let’s add the ‘state’ that will hold our string. We name it ‘bodyContent’ and we included it’s type (an html string) and what way the block can select the container. The selector is very much like jQuery or css selectors.
attributes: {
    bodyContent: {
        source: 'html',
        selector: '.copy-bd'
    }
},
So this is saying that when the editor loads this block up again, the editor should search for the div with class ‘copy-bd’ and match it to this attribute.
Here’s how we wire up the RichText component:
edit(props) {
    const { className, setAttributes } = props;
    const { attributes } = props;

    function changeBodyContent(changes) {
        setAttributes({
            bodyContent: changes
        })
    }

    return [
        <InspectorControls>
            {/* Later, when we have customizable options we will add stuff here! */}
            <div
                style={{
                    padding: '1em 0',
                }}
            >
                Options
            </div>
        </InspectorControls>,
        <div className={className}>
            <div className="media">
                <img src="http://placehold.it/500" />
            </div>
            <div className="copy">
                <h2 class="copy-hd">Heading</h2>
                <RichText
                    className="copy-bd"
                    tagName="div"
                    placeholder="Enter your text here"
                    value={attributes.bodyContent}
                    onChange={changeBodyContent}
                    />
            </div>
        </div>,
    ];
},
Note we basically swapped out the old static div with our RichText component. The important important things here are that we set the value to the attribute, and on the ‘onChange’ event we handle that event with the ‘changeBodyContent’ function.
Now, if we save and edit the block, we should be very pleased to see a working block in the editor. The problem is that we haven’t changed the save method to include our new changes. Let’s do that now.
save(props) {
        const className = getBlockDefaultClassName('guty/media-block');
        const { attributes } = props;

        return (
            <div className={className}>
                <div className="media">
                    <img src="http://placehold.it/500" />
                </div>
                <div className="copy">
                    <h2 class="copy-hd">Heading</h2>
                    <RichText.Content
                        className="copy-bd"
                        tagName="div"
                        value={attributes.bodyContent}
                        />
                </div>
            </div>
        );
    },
‘RichText.Content’ is a utility function on the component that renders out html. If you tried to just place the {attributes.bodyContent} you would see that React would escape that string and a bunch of html would be placed in your block. Lucky for us, we don’t have to render html ourselves using my personal favorite React function dangerouslySetInnerHTML. We can just use the component provided by WordPress!
➡ Exercise! You should try to hook up an attribute to the heading now yourself. Below is how I did it, but don’t look until you’ve tried!
edit(props) {
    const { className, setAttributes } = props;
    const { attributes } = props;

    // we create a function that will take the changes from RichText
    // and update the attributes
    function changeBodyContent(changes) {
        setAttributes({
            bodyContent: changes
        })
    }

    function changeHeading(heading) {
        // using some nice js features instead of typing
        // { heading: heading }
        setAttributes({ heading });
    }

    return [
        <InspectorControls>
            {/* Later, when we have customizable options we will add stuff here! */}
            <div
                style={{
                    padding: '1em 0',
                }}
            >
                Options
            </div>
        </InspectorControls>,
        <div className={className}>
            <div className="media">
                <img src="http://placehold.it/500" />
            </div>
            <div className="copy">
                <RichText
                        className="copy-hd"
                        tagName="h2"
                        placeholder="Enter your heading"
                        value={attributes.heading}
                        onChange={changeHeading}
                        />
                {/* Content is replaced by this guy.
                We determin the class name and the html tag that
                we want it to show as. */}
                <RichText
                    className="copy-bd"
                    tagName="div"
                    placeholder="Enter your text here"
                    value={attributes.bodyContent}
                    onChange={changeBodyContent}
                    />
            </div>
        </div>,
    ];
},

save(props) {
    const className = getBlockDefaultClassName('guty/media-block');
    const { attributes } = props;

    return (
        <div className={className}>
            <div className="media">
                <img src="http://placehold.it/500" />
            </div>
            <div className="copy">
                <RichText.Content
                    class="copy-hd"
                    tagName="h2"
                    value={attributes.heading}
                    />
                <RichText.Content
                    className="copy-bd"
                    tagName="div"
                    value={attributes.bodyContent}
                    />
            </div>
        </div>
    );
},
By the way…
If you run into this…
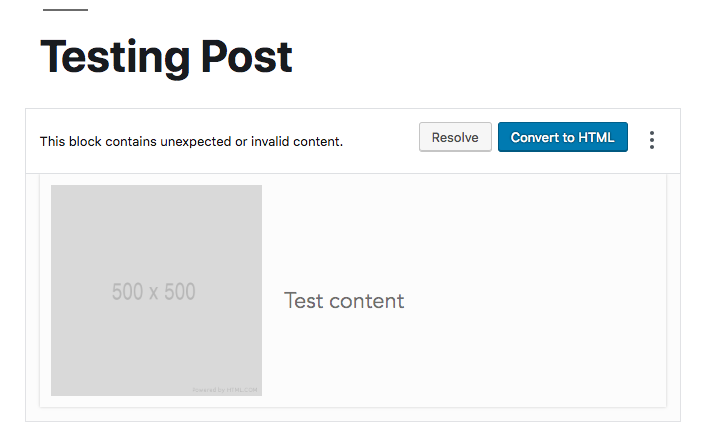
Don’t worry. What it means is that the markup saved in the database is not matching the markup that is being expected by the edit() function. It can be frustrating, but you will need to make sure that markup lines up between the save() method and edit() method. To fix it, remove the old block and re-add your block. This will happen often when you are changing markup stuffs.
Making the image editable using the MediaUpload component
We’re on the home stretch. Let’s import another WordPress provided component to make that image editable!
const {
    InspectorControls,
    RichText,
    MediaUpload // Thanks WP!
} = wp.editor;
Next, we add an attribute to store the URL to whatever image is selected…
attributes: {
    ...
    imgUrl: {
        type: 'string',
        default: 'http://placehold.it/500'
    }
},
Now, this block has a render prop, so basically whatever you want to be the clickable target that launches the media library should go in that…
function selectImage(value) {
    console.log(value);
    setAttributes({
        imgUrl: value.sizes.full.url,
    })
}

return [
    <InspectorControls>
        ...
    </InspectorControls>,
    <div className={className}>
        <div className="media">
            <MediaUpload
                onSelect={selectImage}
                render={ ({open}) => {
                    return <img
                        src={attributes.imgUrl}
                        onClick={open}
                        />;
                }}
            />
        </div>
        <div className="copy">
            ...
        </div>
    </div>,
];
How did I know how to use it this way? I’m searching up the components usage in the gutenberg github docs!
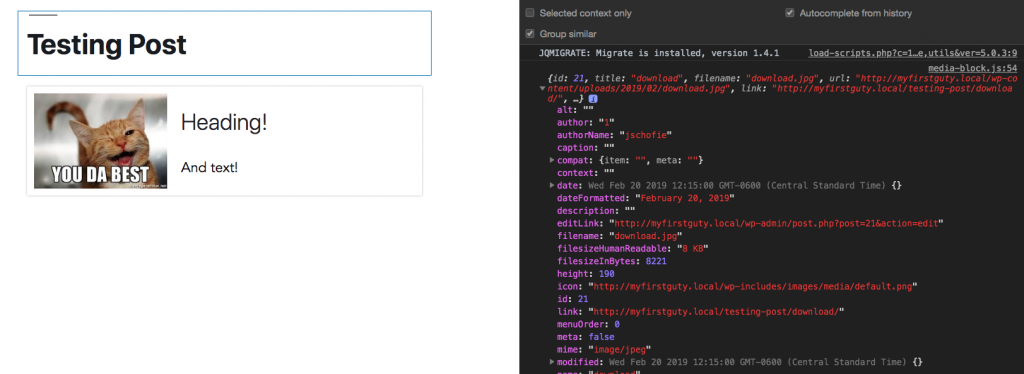
Note that I have to drill down once I receive the “value” from the media upload in my selectImage function. I ended up console logging that value, inspecting that object, and then picking out where the URL actually is.
Now the only thing left is to make sure that image saves!
save(props) {
    const className = getBlockDefaultClassName('guty/media-block');
    const { attributes } = props;

    return (
        <div className={className}>
            <div className="media">
                <img src={attributes.imgUrl} />
            </div>
            <div className="copy">
                <RichText.Content
                    class="copy-hd"
                    tagName="h2"
                    value={attributes.heading}
                    />
                <RichText.Content
                    className="copy-bd"
                    tagName="div"
                    value={attributes.bodyContent}
                    />
            </div>
        </div>
    );
},
And voila!
Now, there are some usability things, like we should probably have the image use a cursor pointer when the mouse is over the image, and a border that appears so the user knows it’s clickable! First, I’m going to wrap my clickable image in a button to make sure it’s accessible.
<MediaUpload
    onSelect={selectImage}
    render={ ({open}) => {
        return (
            <button onClick={open}>
                <img
                    src={attributes.imgUrl}
                    />
            </button>
        );
    }}
/>
Next I’ll add some helper styles to the editor so the user knows the image is clickable. (And note, I’m doing this in editor.scss because these styles should ONLY show up while I’m editing!)
/*
* For styles only loaded in the editor
* These styles are actually inlined using webpack style-loader.  They are not loaded using WordPress enqueuing.
*/
.wp-block-guty-media-block {
    .media:hover,
    .media:focus {
        cursor: pointer;

        // this psuedo element trick allows us to overlay a border
        // that will not affect the size of the image or the media
        // div
        &:after {
            position: absolute;
            content: '';
            left: 0;
            top: 0;
            width: 100%;
            height: 100%;
            border: 4px solid lightgreen;
            pointer-events: none;
        }
    }

    .media {
        position: relative;

        // we need to make the button invisible
        button {
            border: none;
            padding: 0;
            display: block;
        }
    }
}
Whew… now we have a block!
It may seem daunting even when you don’t have to worry about setting up webpack. My hope, though, is this is a good reference for building a majority of blocks out there. Editing text and uploading images are the bulk of a content editor’s needs, and once you get the feel for it, development doesn’t take too long.
What do you think? Let me know in the comments or twitter me @jschof.
Thank you so much for this fantastic article. I haven’t fully checked all of your blog posts but it’s a treasure trove to me!
Sorry if I make some points that you have explained elsewhere on your blog.
/*** IMPORTANT
guty-block-2 on initialise doesnt destruct
getBlockDefaultClassName
Which crashed my WP after the first
…save(props){}
***/
I’m looking forward to learning more about the guty-blocks-2. Really interesting build process.
Would it be difficult to have the node build process define the plugin folder name? For a standalone plugin with just one block ?
All my experiment folders are named `Guty Blocks 2`
I assume (probably wrongly) that it wouldn’t be problematic to rename the folder and all of the relevent plugin php without causing any problems on the gutenberg side?
There is also a broken 404 link to gutenberg docs. https://github.com/WordPress/gutenberg/tree/master/packages/editor/src/components/media-upload
Fantastic tutorial though. Super helpful to see how to properly leverage webpack/react for gutenberg blocks.
I’m so glad it was some help 🙂
Yeah, so things are still moving fast for Gutenberg. Thanks for providing some help with updates and comments. I just can’t keep up with the changes on every article on my blog, so this is helpful.
You should be able to change your guty-blocks-2 folder with no problems. You might also want to change any instances of that name inside of say, package.json.
Looking forward to reading through more. Very clear.
Other posts are explain how it’s enqued with WP backend. Thanks for the suggestions, I would’ve missed package.json.
Thanks again.
Can you pls provide a download for the package? I find it much easier to follow certain steps only when I don’t have to go the full route!
If you go to the repo page, there is an option to “clone or download” which should allow you to get everything in a zip file.
Thank you for this! very clear and effective! Any idea on how to show the image chosen with MediaUpload on the sidebar like the Featured Image?
Anything added inside of
<InspectorControls>will magically show up in the sidebar. If you want, you can add an image there that takes the image url there.Shouldn´t that be <h2 className=”copy-hd”>?
Yup!
I don’t get errors for accidentally using class. But it really should be className because of the whole javascript reserved keywords thing…
Great tutorial!
I’m having trouble with getting it to show up in the editor. I don’t see the block.
Thanks for the post. I was trying to add a button, in case someone wants to remove an image for some reason…
{attributes.mediaUrl!==null
? Remove Image
:”}
Then I have the clearImage function, which changes the corresponding attributes to null…
But my image still shows up.
Do you have an idea of how we can remove the image?
Thanks for the inspiration.