From the get-go I’ve been clear that a Gutenberg Block without a build process probably won’t make sense in the long run because you’re not getting all the nice features that webpack + Babel + JSX has to offer.
But I’ve been pretty much ignoring the fact that you can indeed build blocks in vanilla js. And there have been so many people that are interested in blocks without all the fancy bells and whistles, so I thought I’d write a breakdown of what it means to do a block without a build.
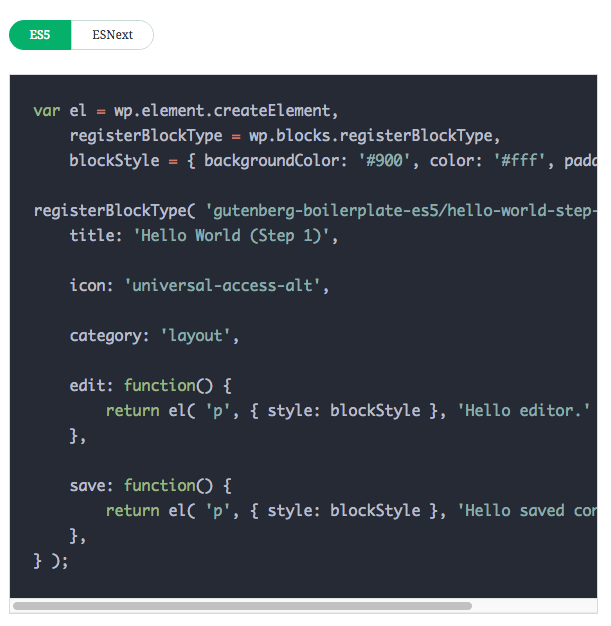
The WordPress documentation does a great job showing us how to build Gutenberg blocks without a build process. In fact, all the examples I’ve seen on WordPress.org show both an ES5 and ESNext implementation.

TLDR: Building Gutenberg blocks without a build environment can be and is done, and there is something nice about not having to build. But it may be difficult to maintain and reason about the templates. Plus you miss out on a lot of features!
Repo for examples: https://github.com/JimSchofield/no-build-guty
Let’s get this block built!
Okey doke, to begin let us create a folder in the plugin directory in your WordPress environment. Let’s greate a ‘vanilla-block.js’ and a ‘vanilla-block.php’ in that folder. Here’s what I put in my php file to allow this to be a recognized plugin and enqueue javascript:
<?php
/**
 * Plugin Name: *NAME*
 * Description: Examples of blocks with no build step
 * Version: 1.0.0
 * Author: Jim Schofield
 * Text Domain: no-build-blocks
 *
 * @package no-build-blocks
 */
// Exit if accessed directly.
if ( ! defined( 'ABSPATH' ) ) {
	exit;
}

/**
 * Enqueue block JavaScript and CSS for the editor
 */
function no_build_blocks_plugin_editor_scripts() {

    // Register vanilla example
    wp_register_script(
        'no-build-blocks/editor-script',
        plugins_url( 'test-block-vanilla.js', __FILE__ ),
        [ 'wp-blocks', 'wp-element', 'wp-editor', 'wp-components', 'wp-i18n' ],
        filemtime( plugin_dir_path( __FILE__ ) . 'test-block-vanilla.js' )
    );

    // Enqueue block styles
    wp_register_style(
        'no-build-blocks/stylesheet',
        plugins_url( 'style.css', __FILE__ ),
        [ 'wp-edit-blocks' ],
        filemtime( plugin_dir_path( __FILE__ ) . 'style.css' )
    );

    register_block_type('no-build-blocks/block-library', array(
        'editor_script' => [
            'no-build-blocks/editor-script',
        ],
        'style' => 'no-build-blocks/stylesheet'
    ));

}
// Hook the enqueue functions into the editor
add_action( 'init', 'no_build_blocks_plugin_editor_scripts' );
Now we just need to make our stylesheet (styles.css) in that same folder. And we also need to actually make our block. Here is a bare-bones vanilla block (named test-block-vanilla.js):
(function () {

    const blockConfig = {
        title: 'Test Block Vanilla Javascript',
        icon: 'smiley',
        category: 'common',
        edit() {
            return wp.element.createElement(
                'div',
                null,
                'Hello, World! I\'m plain js!'
            );
        },
        save() {
            return wp.element.createElement(
                'div',
                null,
                'Hello, World! I\'m plain js!'
            );
        }
    };

    wp.blocks.registerBlockType('no-build-blocks/test-block-vanilla', blockConfig);

})();
Yay! A static block!
I’m kind of cheating…
As I go through these examples you may notice that I’m using some es6 features like const/let and destructuring. Since I’m doing this I’m assuming we’re working with mainly Edge/safari/chrome/firefox… and last I checked those features are pretty well supported. So “vanilla js” in our case is more like “javascript without a transpiler that works in most recent main browsers.”
The main takeaways for “vanilla js”
Takeaway 1: Your javascript needs to be wrapped in an IIFE (Immediately Invoked Function Expression.)
If you use a build process scope is automagically taken care of for you. But if you enqueue Javascript like we are above, and you were to enqueue a different block with its own vanilla js implementation, the global variables you set up here would be available to that other block and vice versa.
You would run into issues, for example, with using the name “blockConfig” in more than one block, because there would be naming conflicts between the different blocks. IIFEs will help you avoid this.
Takeaway 2: It’s actually quite simple to get the things up and running. But beware the cost of not setting up a build environment that doesn’t scale.
It surprised me how simple it was, actually. This is perfect if you were to create a few, simple, standalone blocks. However, when you need to start importing components and sharing styles/style variables, webpack or some other dev environment would be the way to go to streamline your stuff. (That is until browsers start supporting modules, and then it will be great! But I will hold off until dynamic imports are pretty well-supported by all browsers.)
Takeaway 3: It’s almost easier to learn JSX first, then use wp.element.createElement.
The reasoning here for me is that if you understand JSX and get familiar with it, you are better able to translate the JSX requirements into the more verbose createElement syntax.
I won’t disagree that it helps to understand what JSX is doing under the hood. It does. But we can’t learn everything at once.
You can see what JSX transpiles to here. Basically, these two things are equivalent:
// 'vanilla' js
wp.blocks.createElement(
    'div',
    {
        className: 'className',
        onClick: functionName,
        somePropertyForChild: objectThing,
    },
    Children go here!,
    wp.createElement(
        'div',
        null,
        "A child div"
    );
);

// JSX syntax
<div
    className='className'
    onClick={functionName}
    somePropertyForChild={objectThing}
/>
    Children go here!
    <div>A Child div</div>
</div>
Why I continue to prefer JSX
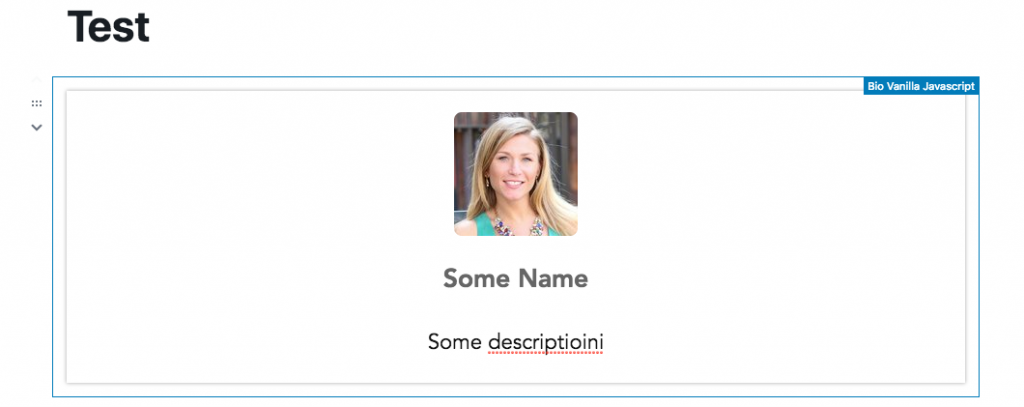
As an exercise, I decided to make a “bio block” of sorts that is completely vanilla js. Here is what it looks like in the editor:

I did this to test out some of the most common block tasks: creating and updating a header, body text, and an image. Here’s my code:
(function () {

    const {
        MediaUpload,
        RichText
    } = wp.editor;

    const blockConfig = {
        title: 'Bio Vanilla Javascript',
        icon: 'smiley',
        category: 'common',
        attributes: {
            imgUrl: {
                type: 'string',
                default: 'http://placehold.it/200'
            },
            bodyText: {
                type: 'string',
            },
            headingText: {
                type: 'string',
            },
        },
        edit(props) {

            function selectImage(value) {
                console.log(value);
                props.setAttributes({
                    imgUrl: value.sizes.full.url,
                })
            }

            return wp.element.createElement(
                'div',
                {
                    className: props.className
                },
                [
                    wp.element.createElement(
                        MediaUpload,
                        {
                            onSelect: selectImage,
                            render(renderProps) {
                                return wp.element.createElement(
                                    'button',
                                    {
                                        onClick: renderProps.open,
                                    },
                                    wp.element.createElement(
                                        'img',
                                        {
                                            src: props.attributes.imgUrl,
                                        },
                                        null
                                    ),
                                )
                            }
                        },
                        null
                    ),
                    wp.element.createElement(
                        RichText,
                        {
                            tag: 'div',
                            className: 'heading',
                            value: props.attributes.headingText,
                            onChange: function(value) {
                                props.setAttributes({
                                    headingText: value,
                                })
                            },
                            placeholder: 'Heading Goes here'
                        },
                        null
                    ),
                    wp.element.createElement(
                        RichText,
                        {
                            tag: 'p',
                            value: props.attributes.bodyText,
                            onChange: function(value) {
                                props.setAttributes({
                                    bodyText: value
                                })
                            },
                            placeholder: 'Body text goes here'
                        },
                        null,
                    ),
                ]
            );
        },
        save(props) {
            return wp.element.createElement(
                'div',
                null,
                [
                    wp.element.createElement(
                        'img',
                        {
                            src: props.attributes.imgUrl,
                        },
                        null
                    ),
                    wp.element.createElement(
                        'div',
                        {
                            className: 'heading',
                        },
                        props.attributes.headingText
                    ),
                    wp.element.createElement(
                        'p',
                        null,
                        props.attributes.bodyText
                    ),
                ]
            );
        }
    };

    wp.blocks.registerBlockType('no-build-blocks/bio-vanilla', blockConfig);

})();
Again, it’s actually quite pleasant until you get to the edit and save methods. In there, I would argue that the rendering of the templates gets near unreadable. But it’s doable!
What do you think?
There are some other options out there to stay away from a build process, and I’ve been pretty opinionated here. What do you think? Leave a comment below, or @ me on twitter
Bro you are the best one!