I just jumped back into Gutenberg block world. There was a tweet floating around where someone wrote a block that functioned a lot like paint (after about 10 minutes searching around for the demo I gave up- let me know if you know what I’m talking about and where I could link to). It got me thinking if I could do something similar…
The repo can be seen at https://github.com/JimSchofield/paint-me-gutenberg-block if you just want to try it out.
I learned a lot, and I want to share my process
I’m going to try to outline how you could also create a slightly less complicated block using the canvas element. I’ve structured this article into the following sections:
In this post:
- Simplifying the build environment
- Setting up/installing the block as a WordPress plugin
- Styles and stylesheets v.s. inline styles
- Setting up a component
In the part 2 post:
- Strategy for storing data and using components
- Running Javascript on the view side of WordPress
Simplifying the build environment
The biggest downside to Gutenberg blocks is that creating a front end build environment can seem intense, especially for those who are used to just editing a script and seeing the changes appear without having to go through setting up a big scaffold of build tools and dependencies.
I don’t think there’s a good way to get back to the “good ‘ol days” of just editing a script. I think we need to embrace a lot of the powerful tools to build Javascript. In the end, it makes things more reusable and easier to reason about.
With that being said, here’s a (slightly) simpler setup to create a Gutenberg block…
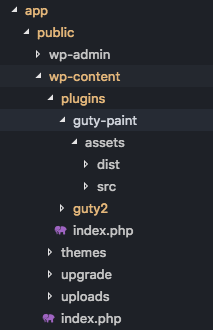
First: We need to have a WordPress environment started up (I recommend local by flywheel), and a folder created in the WordPress plugin directory. I’m going to name mine ‘guty-paint’. I’m going to structure my files like so…
Second: Let’s install our javascript dependencies. In your terminal, cd into ‘guty-paint’ and…
npm init -y(-y allows us to skip all the npm questions). Now for the actual dependencies:
npm install --save-dev webpack webpack-cli @babel/core @babel/preset-env @babel/preset-react babel-loaderThis is where many get sad. Let me run through what these are before you get too sad:
- webpack – This will be the processor that processes all of our files and bundles our executable javascript into one tidy javascript file
- webpack-cli is a handy tool so we can run webpack using simpler commands
- @babel/core is the main javascript transpiler in use these days. It allows us to write in the newest javascript syntax, and…
- @babel/preset-env and @babel/preset-env are the settings that specify that, yes, we can use JSX and, yes, we can use es6/es7/<insert super advanced fancy syntax here>
- babel-loader ties babel together with webpack to make everything work nicely
Third: Let’s configure our webpack file and a .babelrc file.
Here is an annotated webpack config. You don’t have to understand all that goes on here, but it would be nice to know if you have to tweak things.
I’ve created a ‘webpack.config.js’ file in the ‘guty-paint’ directory and inside:
// A node thingy that helps with paths... not sure on specifics
const path = require("path");

// Config for regular blocks
module.exports = {
    // entry points to the main js file for our build
    entry: "./assets/src/index.js",
    // and output lets us specify where it should be built to
    output: {
        path: path.resolve(__dirname, "./assets/dist"),
        filename: "build.js"
    },
    module: {
        rules: [
            {
                // If Webpack sees a .js file, use babel when it builds
                test: /\.js$/,
                exclude: /node_modules/,
                loader: "babel-loader"
            }
        ]
    },
    stats: {
        // Pretty colors in messages!
        colors: true
    },
    externals: {
        // We don't want webpack to bundle React in our files (that would make our
        // files huge!) so we say that whenever a file requires "React",
        // Webpack won't bundle it.  We're promising, though, that we're providing
        // React somewhere else (maybe a CDN or on the window)
        // so luckily we can through WordPress.  React is in core now, yay!
        react: "React"
    }
};
Cool. And then we just need to tell Babel what presets to use. So in that same folder, let’s make a ‘.babelrc’ file:
{
    "presets": ["@babel/preset-env", "@babel/preset-react"]
}
Now that wasn’t too bad.
Fourth: We have to make a js file that gets built. So to make sure our build process works, got to ‘assets/src’ and create ‘index.js’:
console.log('Hello from guty-paint')
And in our package.json, let’s add the following scripts so that we can run this thing:
...,
"scripts": {
"build": "webpack --config webpack.config.js --mode=development", //new
"watch": "webpack --config webpack.config.js --mode=development --watch", //new
"test": "echo \"Error: no test specified\" && exit 1"
},
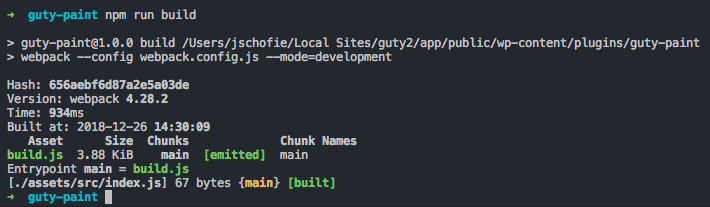
...Now the moment of truth. Run ‘npm run build’. You should be rewarded with a nice build message:
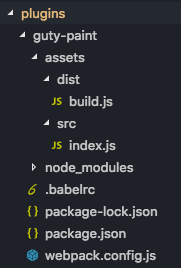
In summary, we have a build process running, and our folder should look like this:
Setting up/installing the block as a WordPress plugin
Okay, so we have to get this thing to work in WordPress. Let’s create a plugin file that will enqueue our scripts in the editor and make this folder recognizable as a plugin. I’ve created ‘guty-paint.php’ with the following in it:
<?php
/**
* Plugin Name: Guty Paint
* Description: A gutenberg block paint project
* Version: 1.0.0
* Author: Jim Schofield
* Text Domain: guty-paint
* Domain Path: /languages
*
* @package guty-paint
*/
// Exit if accessed directly.
if ( ! defined( 'ABSPATH' ) ) {
exit;
}
function guty_paint_editor_scripts() {
// Enqueue block editor JS
wp_enqueue_script(
// the php name for this
'guty-paint/editor-scripts',
// Where the file is
plugins_url( '/assets/dist/build.js', __FILE__ ),
// various dependencies js needs loaded with the script
[ 'wp-blocks', 'wp-element', 'wp-editor', 'wp-components', 'wp-i18n' ],
filemtime( plugin_dir_path( __FILE__ ) . '/assets/dist/build.js' )
);
}
// Hook the enqueue functions into the editor
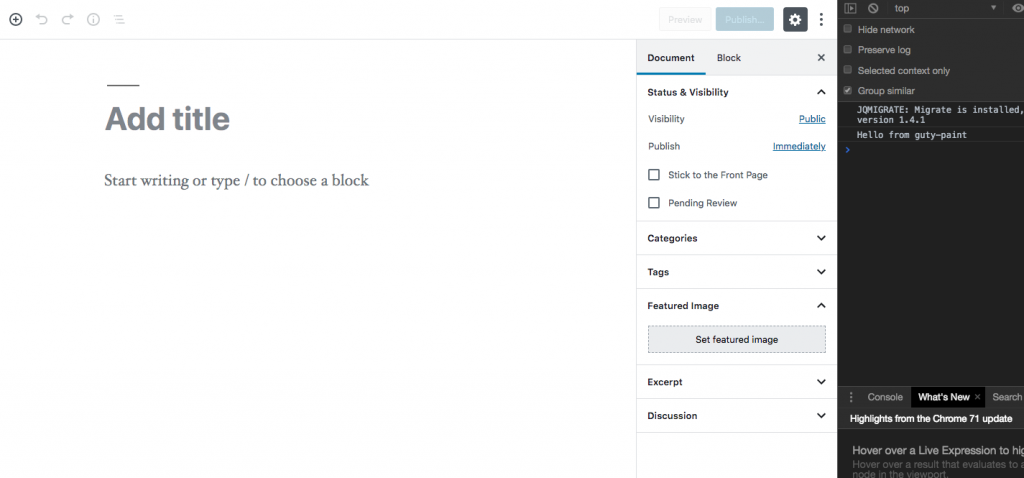
add_action( 'enqueue_block_editor_assets', 'guty_paint_editor_scripts' );If you go into the plugins page in WP admin you should be able to activate “Guty Paint”! Once activated, create a new post and open your browser console. We will then be greeted by our new block if our scripts are being loaded correctly
But we don’t see a block we can select yet!
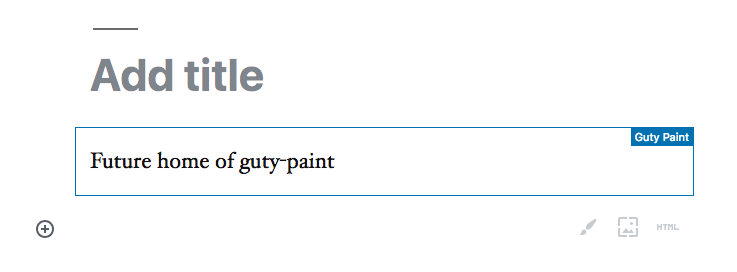
Let’s change our index.js file to this:
const { registerBlockType } = wp.blocks;

registerBlockType("guty-paint/block", {
    title: "Guty Paint",
    icon: "admin-customizer",
    category: "common",

    attributes: {},

    edit(props) {
        return (
            <p>Future home of guty-paint</p>
        );
    },

    save(props) {
        return (
            <p>Future home of guty-paint</p>
        );
    }
});
This is where javascript says “hey, WordPress, we have a block we want you to offer in the editor, and here’s the code for it.”
It’s not that interesting right now. If you run ‘npm run build’ and reload the editor, you should have the option to add ‘guty-paint’
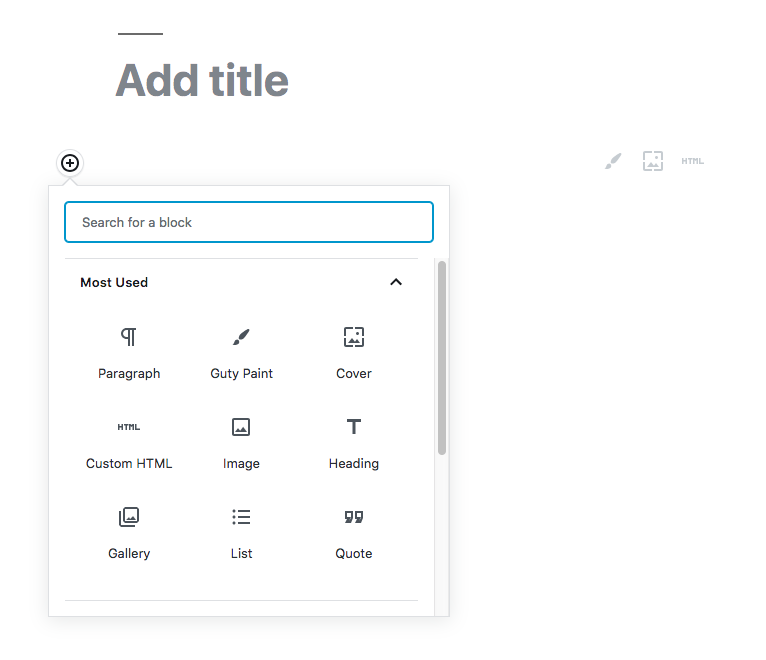
Admittedly, it’s not that interesting yet…
But we have what we need to start creating the interactive part of the canvas.
A note on styles and CSS…
I’ve been dealing a lot with how to extract stylesheets from webpack and enqueue them in WordPress. It. Is. A. Pain. For this tutorial, I’m going to simply use inline styles, because I can :). You won’t find information about css enqueuing for blocks here, but you can check out this.
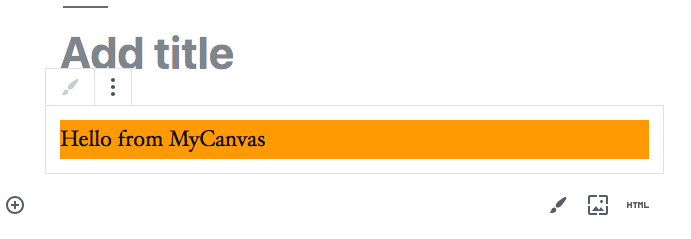
Lastly, creating the canvas component
Let’s create another js file called ‘MyCanvas.js’ in the ‘assets/src’ folder and put the following in it:
import React from 'react';

export default class MyCanvas extends React.Component {
    render() {
        return (
            <p style={{ background : 'orange' }}>Hello from MyCanvas</p>
        )
    }
}
Our goal is to have a single React component be the canvas for the editor and for when people are viewing the content. We need to now import this component and use it in index.js:
import MyCanvas from './MyCanvas'; // new!

const { registerBlockType } = wp.blocks;

registerBlockType("guty-paint/block", {
    title: "Guty Paint",
    icon: "admin-customizer",
    category: "common",

    attributes: {},

    edit(props) {
        return (
            <MyCanvas /> // instead of rewriting, we just use our component
        );
    },

    save(props) {
        return (
            <MyCanvas />
        );
    }
});
If you load our editor once more and add guty-paint you should see a beautiful, halloweenish, block.
Continued in part 2
Here’s the repo for everything we did today: https://github.com/JimSchofield/guty-paint-tutorial/tree/master
Hey Jim,
Thank you so much for this tutorial, I have been struggling for the past 3 days to import React components into Gutenberg and had tried writing the React component from within the `index.js` file but hadn’t been successful, it didn’t even occur to me to do an import… lol…
Anyway looking forward to the second part of this tutorial.